
Figure Out Figma: How to Use the Prototype Feature
Learn how to turn your wireframe or mock-up into a prototype with Figma.
Requirements
- Figma account
- Wireframe or Mock-up in Figma
- Some basic experience using Figma
Introduction
Figma is a cloud-based interface design tool, and is particularly helpful for environments requiring team collaboration. I’ve enjoyed using the program myself for designing wireframes and mock-ups in recent months, and I have come to really appreciate its capabilities. It can also be useful for creating quick and easy prototypes for websites. In this post, I’m going to walk you through how to use Figma’s prototype tool.
Before you begin using the prototype tool, you’ll want to have a wireframe or mock-up in Figma that is completed (like the example below). If you don’t have a wireframe/mock-up and this is your first encounter with Figma, I recommend checking out some tutorials on how to use the program, like this one from Courstro. Simply getting into Figma to start creating or downloading a template and working through how to use its design features can also be a fruitful, hands-on way to learn your way around. If you’re already familiar with Sketch, it shouldn’t take long to feel at home with Figma as well.
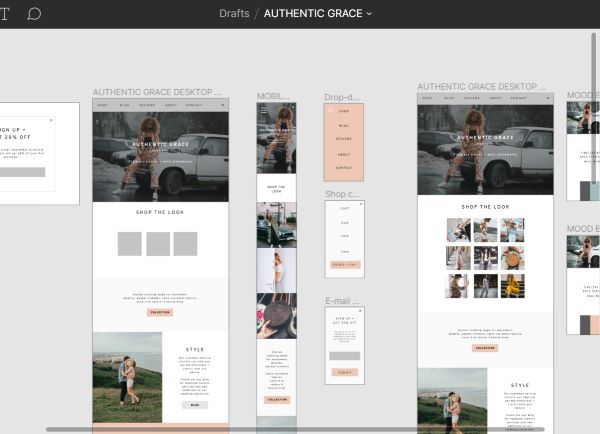
Like in the above example, along with your standard desktop and mobile web page designs, you’ll want to plan and design the other pages, features and interfaces you’ll need to interact with for your website. Above, we have artboards for email modal pop-ups, a simple shopping cart and a mobile menu in addition to several versions of a homepage.
How to Use the Figma Prototype Tool: 10 Steps
Step 1: Map interactions/actions. After wireframing and creating your mock-ups, map the actions your site will need to take in relation to other pages and parts of your design if you haven’t done this already. Consider how users will interact with the site. What will be clicked on by a website users? What happens after a click? Do you have any pop-up screens that need to become visible when the user lands on a page? What elements of your site require some sort of functionality? Review your elements, pages, and links, and make sure you have a good understanding of what items are actionable and how your artboards relate to each other. Flow charts can be really helpful for mapping how a user will be interacting with your site, and how the site should respond. Make sure that you have all the artwork in Figma that will be required for your prototype. Once you have the required artwork and a basic map of what functionality goes where, you can start your prototype.
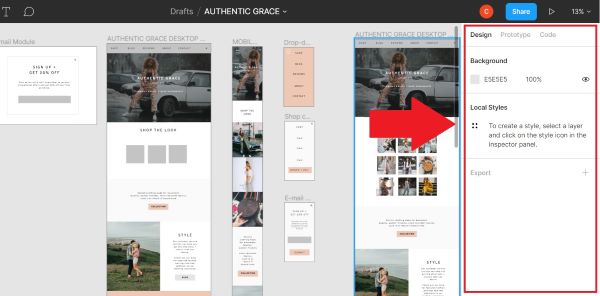
Step 2: Locate Prototype mode. Locate the menu on the right of your screen.
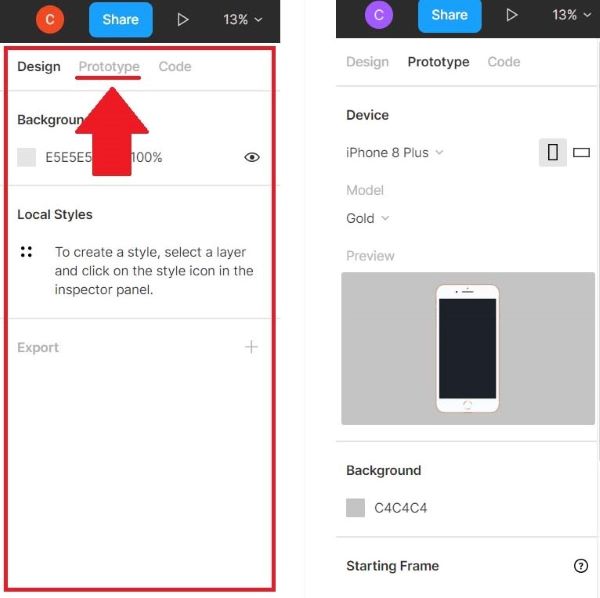
Step 3: Select Prototype mode. At the top, you’ll see options for Design, Prototype and Code. Select Prototype.
Step 4: Choose your first point of interaction. Select an element in your design that will need to facilitate a certain action/function. In the image below, for example, I’ve selected the “hamburger” for the mobile navigation bar, because I know I want a navigation bar to appear when the hamburger is selected.
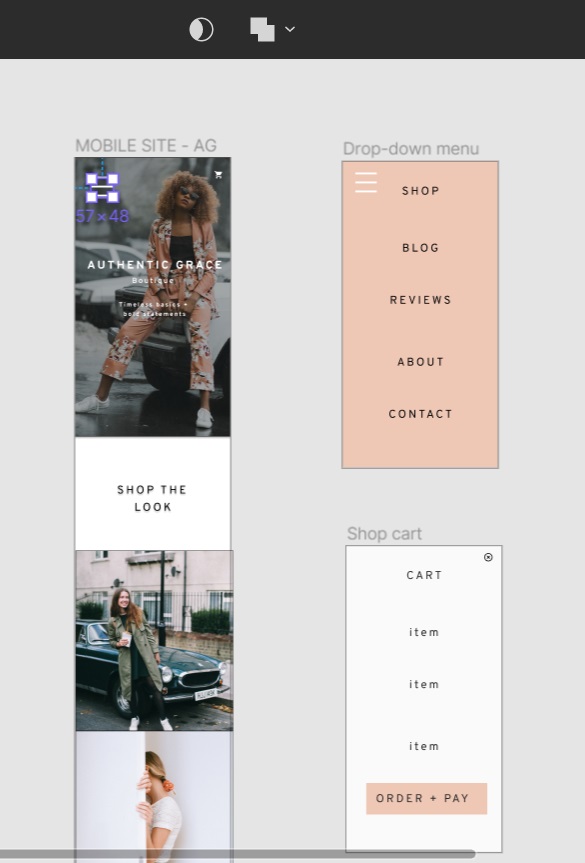
Step 5: Update the interaction settings. The right-hand bar should display several different setting options under Prototype. First, change the Interaction settings to the type of interaction the user will be engaging in with the web page and choose the initial action that will be taken upon interaction. For this example, I’ve chosen to open an overlay when the “hamburger” is tapped. I’ve also selected the nav bar artwork (the mobile drop-down menu) that should appear as a result of a user tapping on the hamburger for this website prototype.
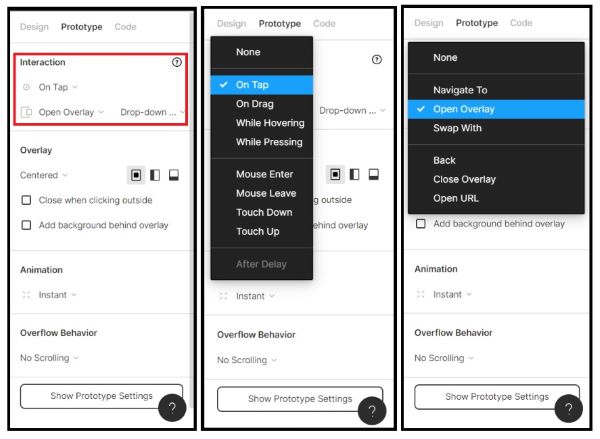
Step 6: Adjust any additional settings in the rest of the menu bar. For this example, the settings for the menu (overlay) that appears is centered on the screen, does not have a background behind the overlay and pops up instantly when tapped.
Step 7: Check your artboards Figma will map the action you just set up, and it will look something like the photo below:
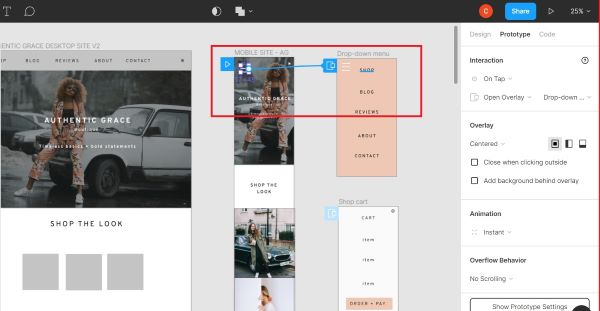
You can click the “play” triangle button to review your settings.
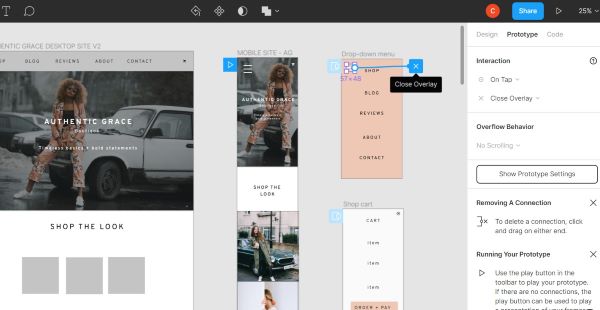
Step 8: Once you’ve finished the settings for your first interaction/action, set up any related actions that may need to take place. I knew the “hamburger” in the menu would need to close the menu when clicked, so I selected the hamburger and updated the prototype settings to facilitate this action.
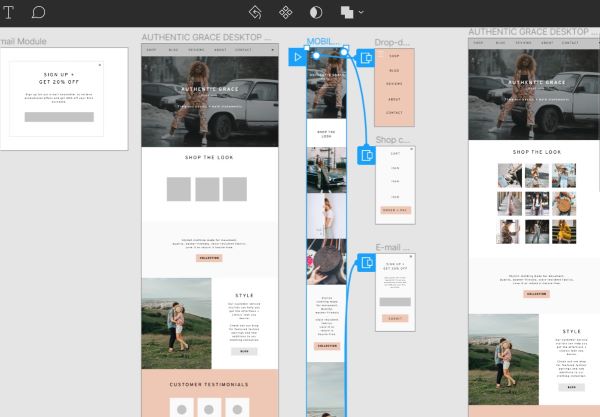
Step 9: Repeat for any additional functionality you want to demonstrate in your prototype. Actions can be set up to display what happens for multiple interactions on a website, and once you’ve set up all of the interactions you want to show in your prototype, you may have a map in Figma that looks something like the example below:
Step 10: Review your prototype. To see your prototype in action once you’ve applied all of the settings for the interactions you need, just click the Present/Play button in the right hand corner of your window, just above the menu bar on the right. From there, you’ll be taken to a screen where you can interact with your site as it would be presented to a user. This is your live prototype that you can present to a team, client, friend, etc. You can click on any element you set up on the previous screen and see how it functions. Screenshots of the mobile version of my prototype are shown below.
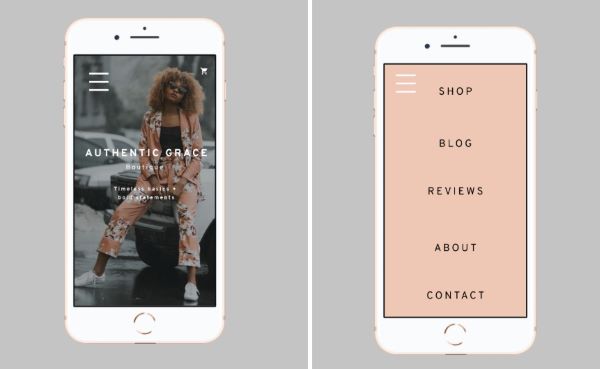
You're All Set! Once you learn your way around Figma’s prototype tool, it doesn’t take much time at all to create a beautiful, functioning prototype for your site. One of the best ways to learn how to use this tool is just to jump in and try it yourself, so get busy! Happy prototyping!

Claire Helland
Claire Helland is part-time Marketing and E-Commerce Consultant, MomsCanCo. coding student and joyful full-time Mama of a spirited toddler. Informed by over seven years experience working with airlines, and degrees in science and business, Claire is a small-business “Swiss-Army knife” with skills in branding, web design, integrated marketing communications, Public Relations and more. Claire has worked with domestic and international teams to successfully manage multiple website redesign and e-commerce implementations and develop practical, budget-friendly strategies to help bring small and mid-sized airline networks into the modern age. She champions a data-driven, authentic and holistic approach to business communications.Learn Digital Skills
Find out when the next cohort begins!
The most comprehensive program to up your game in the remote career world.
Learn More